

This is lesson 10 in the ‘Marketing your Quicket Event’ course.
Click here to go back to the previous lesson or click here to go to the start of the course.
Welcome to lesson 10 of our ‘Marketing your Quicket event’ course. At the end of this 10-part course you’ll have all the tools you need to market your event effectively, ensuring you have as many ticket sales as possible.
This lesson covers:
For a bit of a shift in gear back to social media, let’s go through what you need to know to get started with paid ads.
The world of paid ads is a vast one, and it’s easy to be overwhelmed, but you don’t need to be an ads guru in order to run some paid ads to advertise your event to a broader audience.
Tip: If you've a already run some ads or boosted posts, great! The rest of this lesson has information that is just as relevant to you and information you might not have considered, so we’d still recommend working through it.
About those ads...
Lesson 10: Using part of your marketing budget for paid digital ads - Section 1
It’s highly recommended that you allocate as much of your marketing budget as you can to running targeted paid ads on social media (but still diversify your efforts!). When done right, these can have a great return on investment.
As an event organiser, making the most of your marketing budget is key, and a lot of what you can do in this area is fairly easy to follow and readily available in top-quality free courses. Upskilling yourself is a sure-fire way to make an impact on your ticket sales and the popularity of your events.
Before we give you our overview of running a basic ad for an event, take note that Facebook has an excellent portal of courses called Facebook Blueprint. It’s the ultimate resource for everything Facebook, Instagram and digital marketing, advertising on Facebook and running paid ads. Click here to access it.
On that note, Google also offers their Digital Garage which has a digital marketing section, which is just as worth delving into down the line. We’d suggest starting with Facebook Blueprint, though, since Facebook is events-mecca. Google’s course will equip you for digital marketing extending beyond social media - your website, ads on Google, etc. are all highly important touchpoints that you can maximise. Click here to access it.
But how do ads on Facebook work?
In (a very brief) summary:
What you need to get started with ads on Facebook
Lesson 10: Using part of your marketing budget for paid digital ads - Section 2
Paid ads on social media is a crucial part to any advertising strategy. Facebook very selectively shows content to users organically (i.e. without payment to show it to specific people), so utilising their ads offerings is a no-brainer.
Here’s what you need:
- Facebook page
If you have a Facebook page (we created one with you near the start of this course), you’ll have access to the Facebook Ads Manager tool, which is where all your ad campaigns will run through. You can also access this at facebook.com/ads, or by clicking “Manage Ads” in the drop-down menu on your Facebook account. - A clear goal
Having a clear goal in mind will help navigate your way through the many options available to you. In your instance, it’s likely this goal of yours would be to send more people to your event page on Quicket and for them to purchase tickets. - An angle or concept
Think of how you’re wanting to advertise your events and the underlying message you want to send. This will determine the words you use in your ads. Each ad has a few fields that you can add text into.
Come up with several concepts, and from these, create sets of ad content. Run them against each other and see what performs best.
Image Specs
- Images
The specs for these ads are the same as the ones used for Facebook posts. Click here to see these dimensions in our Image Specification Cheat Sheet. If you’re working with a designer, as we recommend, you don’t necessarily need to understand these required specs, but do pass them on to your designer.
It’s also important that this image is a PNG-24 format, and saved for web. Anything else will not be displayed to your audience in a way that looks good.
Lastly - and this is where ads differ greatly to posts - keep the text included on your image to a minimum. We recommend the text not taking up more than 30% of the image overall. Facebook has an algorithm that determines how many people in your targeted audience will be shown your ad. If your image has too much text, it will be shown it to fewer people. - Your live Quicket event page direct link
Yep, it’s pointless running the ads if you’re not going to be directing people that see them to your goal: buying tickets to your event.
Once your event is live on Quicket, grab your direct event page link and use this link for all your ads.
It’s preferable that you use a link campaign for this - remember those from the start of the previous lesson? If you use a different link campaign for each ad that you run, you’ll clearly be able to see which ads brought in visits and ticket sales, and more importantly - which ads you might be wasting budget on if they’re not working. - A credit card
You will link this card to your Facebook ads account, so that Facebook is able to charge you for the ads that you run. (Don’t worry! Facebook only charges amounts within the budget you set for an ad.)
Suggested strategies and getting started
Lesson 10: Using part of your marketing budget for paid digital ads - Section 3
There are numerous different types of Facebook ad campaigns that you can run, with a variety of goals, and seemingly unlimited options available to you.
We’ll cover one approach here, but we encourage you to read up on the resources available online and make decisions based on your specific needs. In addition to Facebook Blueprint above, Buffer has this guide to Facebook ads (and there are loads of other options online).
Consider using this two-tier ad strategy:
- Tier One: Target a specific audience on Facebook based on criteria you set, and drive them to your Quicket event page (new traffic) - this is readily available on your Facebook page’s ad manager.
We'll cover ‘Tier One’ shortly, but if you need to skip ahead to it, click here. - Tier Two (advanced): Target people who have visited your Quicket event page but who have not bought tickets yet - this is called retargeting, and is highly effective as your marketing budget is spent on people who are already interested in your event. As you can imagine, it’s far more effective than a wide net approach. You’ll need to set some things up between Facebook and Quicket to enable this.
We'll cover the advanced ‘Tier Two’ shortly, but if you need to skip ahead to it, click here.
Facebook has different types of ads you can run.
You may have heard of a ‘Boosted post’ before. This is when you create a post on your Facebook page and boost it, essentially converting your post into an ad and showing it to more people than those who follow your page. It runs differently to an ad though - you don’t get a proper report afterwards, and you can’t set an objective to start.
Instead, you can also create an ad directly from Ads Manager. This is the approach we prefer as we find it more effective in getting closer to our goals. You’re also able to filter your ads according to objective, audience demographics and ad delivery, regardless of whether the ad is active, complete, etc. - which is great for comparing how different ads have performed. In our examples below we’ll use the Ads Manager route.
What about business manager?
Find Out More
If you have more than one person needing to access your page, you may want to consider using Business Manager. It’s a far more secure way of running multiple pages or having multiple people work on your ads account with varying access permissions. Click here for more on this.
Business Manager is different to Ads Manager, but you can access Ads Manager through it.
Get started on Ads Manager
To start, click here to go to Facebook Ads Manager.
Ads Manager
First, you’ll need to read and accept Facebook’s non-discrimination policies. It’s important to take note of these, especially if you plan on running any ads that relate to housing, employment or credit. Click on the links available to review each of the policies then click ‘I Accept’.

Next, you’ll need to set some account and payment settings.
Ads Manager account and payment settings:
- Click on the gear icon from the menu.
- Under Ad accounts:
- Rename your ad account if you wish
- Check your time zone
- Check your currency
- Set your advertising purpose (whether your ads will be for business purposes or not)
- Add your Business name
- Add your Business address
- Add the country your business runs in
- If your business is not tax registered, then you don’t need to add your tax number. If you have one, add it here.
- Click ‘Save Changes’
- Under Pages on the menu bar, you can access your page’s settings, but you can also access these directly from your page.
- Next click on ‘Payment settings’ from the menu bar. Under Payment settings:
- Click ‘Add Payment Method’
- Add your VAT number (optional) and click ‘Continue’
- If you plan to pay with a card, add your card details here and click ‘Continue’ to follow the prompts and finish adding your payment method.
- Optionally, you can also set an account spending limit, which will take preference over any individual ad campaign budget limits you’ll create later on.
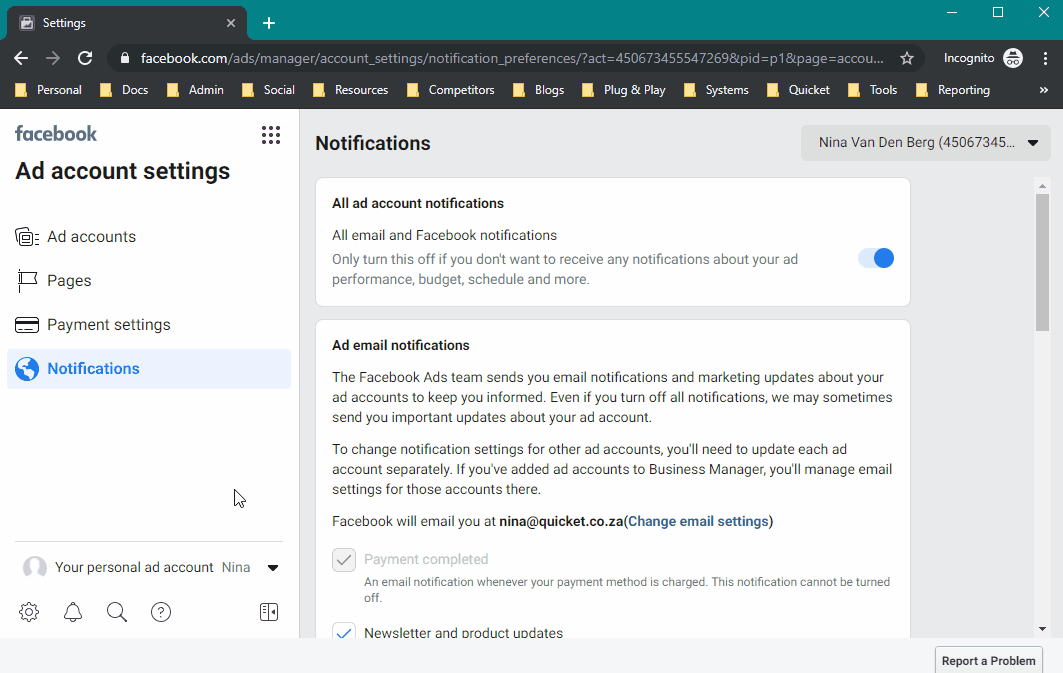
- Click on ‘Notifications’ on the menu bar. Here you can set which notifications you wish to receive. It might be useful to leave them all on at first, and switch them off as you come across any notifications you’d prefer not to receive.
Click on the grid icon and select ‘Ads Manager’ to continue creating your ads.
Tier one: New traffic from Facebook to your Quicket event page
Lesson 10: Using part of your marketing budget for paid digital ads - Section 4
Creating your ad campaign happens in three stages. Following Facebook’s prompts and our guide below will walk you through these. At the end of them, your ad will be under review to be published.
Ads Manager
If you’re not already in Facebook Ads Manager, click here to head there then click on the green ‘Create’ button. You’ll now see a menu that shows all the parts of your ad split into those three stages.
The campaign is the collective shell for all parts and settings of your ad campaign. It holds the type of ad, objective, budget, who you’re targeting, and the ad itself.
- You’ll see you’re first asked to set a marketing objective. Selecting each of these will create a different type of ad, which are charged differently. Some of them will use up your set budget a lot quicker than others.
For the purpose of driving traffic to your event page on Quicket, select the ‘Traffic’ option in the ‘Consideration’ section. - Scroll down and give your campaign a name. Be clear in this name so that down the line when you have run many campaigns, it’s clear which is which. It’s good practice to name your campaign with the start date at the start, i.e. “20191029 Chill-Ice Fest 2020 New Traffic”.
- Below campaign name, you’ll see the ‘Create split test’ option. This is great to experiment with down the line and test different images, text, etc. against each other, but for now, leave this set to ‘OFF’.
- Next, in the ‘Campaign budget optimisation’ section, switch the toggle to ‘OFF’, since you’re running this campaign as a standalone one.
- Click the blue ‘Set up ad account’ button.
- Check your ad account settings and click ‘Continue’.
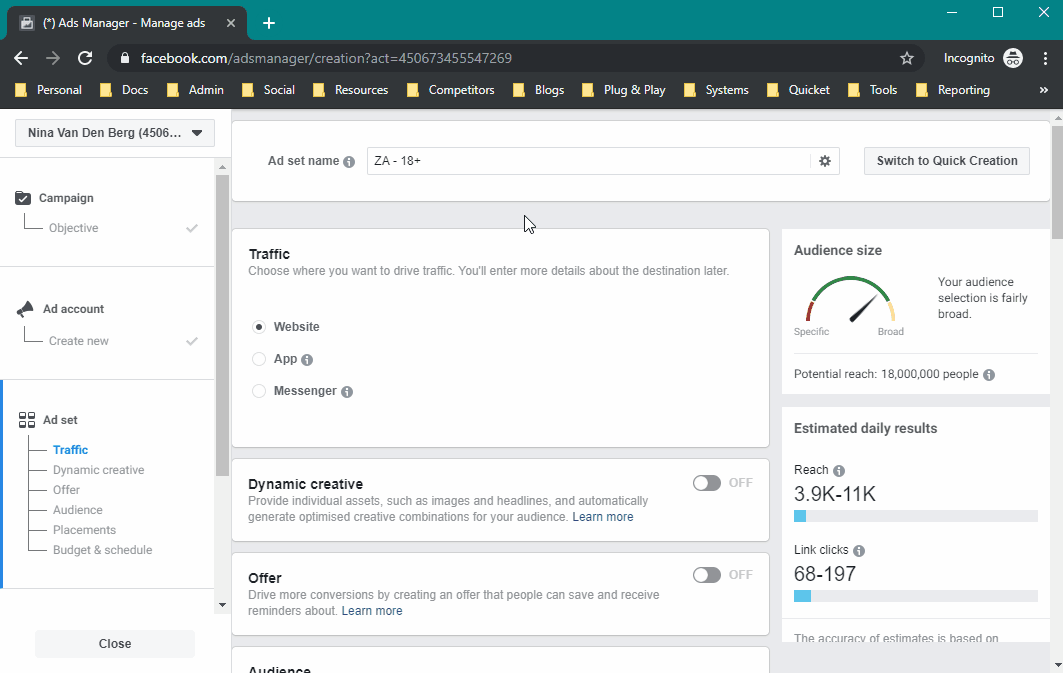
The ad set is where you set a budget, select who to target your ad to, and how you will be billed for your ad.
- First, give your ad set a name. It’s useful for this name to be descriptive of the audience you’ll be targeting. For example: “Cape Town 18+ Festival focused’.
- Under ‘Traffic’ select ‘Website’ since you’ll be sending people who see your ad directly to your event page on the Quicket website.
- You can leave both the ‘Dynamic creative’ and ‘Offer’ settings on ‘OFF’ but feel free to research it should you wish to explore those options.
- Under ‘Audience’ is where you’ll set your ad’s targeting. If you haven’t created an audience before, stay on the ‘Create new audience’ tab.
- Keep the ‘Everyone in this location’ drop down set as is.
- Under ‘Location’, set the name of the city your event is being run in. You could set your country, but you’ll be more likely to get more value from your ad by setting it to your event’s city as those people won’t have to travel too far to attend the event. You can add multiple locations if your target audience spans more than one area.
- Under ‘Age’, set the age range of the people you are wanting to target with your ad. Think carefully about this and don’t make assumptions about your audience, but if you know there’s an age-bracket that your ads will be wasted on, exclude them.
- If you want, you can limit your ad to show to certain languages under the ‘Languages’ section. Generally speaking though, this isn’t advised, unless your event is specifically for people who only speak a specific language.
The ‘Include people who match’ section allows you to be very specific with your targeting.
- Here you can include people who have certain jobs or interests listed on their Facebook profiles, people from certain demographics, or people who exhibit certain behaviours on Facebook.
- For example, you could select ‘Festival’, ‘Music festival’, and even the specific names of artists or speakers on your lineup from the interests. You could choose student as a job title, or people that have specific job titles that are common in the industry your event appeals to. An example behaviour you could choose is people who are interested in upcoming events. You could even select specific relationship statuses, education levels, and other demographics.
Think of your audience and type in things that you think might apply to them to see whether those are options you can select. Add as many as you can. - Once you’ve selected a few, click the ‘Suggestions’ link to get more ideas. Select ‘Browse’ to look at all the options available to you.
Optionally, you can ‘Add a connection type’ if any of them are applicable to the people you want to advertise your event to.
- For example, you may want to exclude people who have already responded to your event on Facebook, as they already know about it. You may want to include people who like your page if you haven’t advertised your event to your page much.
- Click ‘Save This Audience’.
Note that if your audience is too narrow, Facebook will let you know in the ‘Audience size’ gauge. A too-small audience may need to be broadened in order to target your ad. - Under ‘Placements’, leave this set to ‘Automatic placements (recommended)’.
- In the ‘Budget & Schedule’ section, there are a few things to set.
- Keep ‘Optimisation for ad delivery’ set to ‘Landing page views’. You could also change this to ‘Link clicks’, but these people may likely be less interested in your event.
- Leave ‘Cost control (optional)’ blank unless you wish to research this option more to decide if you should use it or not.
- Leave ‘Cost control (optional)’ blank unless you wish to research this option more to decide if you should use it or not.
If you’re starting out, you’ll be limited to the budget you can initially set, until you’ve proven to stick to Facebook’s policies for a few weeks. Thereafter, you’ll be able to run higher spending campaigns. - Select whether you want your ad set to run continuously starting today, or whether it has an end date. If you’re starting out, we recommend setting an end date to avoid the possibility of forgetting your ad and being charged more than you intend to spend. Selecting this option will give you start and end date fields to select. Perhaps run your campaign for two weeks as a start, or run it until your event but check on it daily to see how things are going, and to take it down if your event sells out.
- Click the blue ‘Continue’ button.
This is where you create the ad that people will see.
- First give your ad a name. Once again, be descriptive so that you know which ad you’re referring to in your reports. For example, you could reference what the image and text of the ad refers to.
- Under identity, select the Facebook page and Instagram account the ad relates to. If you haven’t connected your Instagram account to your page, click the ‘add an Instagram account’ link to log into Instagram and link your account.
- For this example, stay on the ‘Create Ad’ tab. If you have an existing post published to your page from which you would like to base your ad, you can select the ‘Use existing post’ tab instead.
- Next, select the format of your ad. Select ‘Single image or video’ for this example, but you can research and explore the other available options to see if the added cost of those is viable for your specific event.
- Similarly, leave ‘Add an instant experience’ unchecked, unless you’ve researched this and decided it’s right for your needs.
- Add the media for your ad. We’ve just added an image (as opposed to a video) here for our example.
- Under Text & links:
- Fill out the text for your ad. Your primary text displays first, and your headline and description will display below your image or video.
- In the website URL field, add your direct Quicket event page link. This will send people to book tickets from your ad via the shortest possible route. Very important: here is the ideal place to use a unique link from your link campaigns so you can see which ticket sales and visits came from this specific ad. We outlined this in the previous lesson if you’d like a refresher.
- The display link field can be left blank, or you can customise it as.
- Select a ‘Call to action’ for your ad. We recommend using the ‘Book Now’ one. This will display as a button on your ad that links to your event page.
- You can also edit the background colours for your stories.
As you complete this, you will see a preview of your ad. Cycle through the different views of your ad to check that you’re happy with how it displays everywhere. - You can create your ad in different languages as well. Research this option if you know the online presence of enough of your audience is in an additional language.
- Next, you’ll see the ‘Tracking’ section. You can leave this out for this ‘Tier One’ ad, but it’s needed in the more advanced ‘Tier Two’ approach.
- Click the green ‘Confirm’ button.

Tier two: Targeting people already interested in your event
Lesson 10: Using part of your marketing budget for paid digital ads - Section 5
Setting up an ad like this is far more advanced than the Tier One suggestion above. You’ll need to understand what tracking pixels are and how to use them on Facebook and to create custom audiences - these are different from the types of pixels referred to in terms of images and design.
About FB Pixels
To learn more about Facebook tracking pixels, click here to access the Facebook Blueprint lesson. You can also learn more about them here.
In order to target people who have performed specific actions on your Quicket event page, you’ll need to set up a tracking pixel on Facebook first - but note that you will not need to add any code to a website. Our tracking scripts feature does this automatically to Quicket’s website for you. You’ll simply need to add your Facebook pixel ID to your Quicket account.
Connect your pixel to your Quicket account
- First, make sure you have your Facebook pixel ID.
- Next, log into your Quicket account.
- Under ‘My Events’ in the menu, select ‘Tracking Scripts’.
- Click the ‘+ Connect a new tracking service’ button.
- Add a name in the ‘Name this connector’ field that will help you easily identify what it’s referring to, for example, “Exciting Events Facebook pixel”.
- Choose which service this connector is for under ‘Choose a service’. In this example, it will need to be Facebook, but you have the option to connect your Google Analytics account as well.
- Take your Facebook pixel ID and add it into the ‘Tracking ID’ field.
- Select which organiser profile you want tracking related to this pixel to occur for under ‘Add tracking to these organiser profiles’. For example, you may have a different pixel per event brand that you run.
- Select which active or upcoming events you want to add tracking to under ‘Add tracking to these events’.
- Next, select which pages of your Quicket event page you would like to have tracked under ‘For the selected events, which pages need tracking?’. You can choose any or all of these to track:
- Event details: this is your event page on Quicket where guests find information about your event and start the booking process.
- Ticket checkout: this is the checkout page where guests enter their payment details and ticket holder information.
- EFT successfully reserved: if guests choose to pay by EFT / bank transfer, this is the page that tells them they have successfully reserved their tickets.
- Booking completed: if guests choose to pay by card, this is the page that tells them their booking and payment were successful.
- Widget view: this will allow you to track the Quicket ticket widget on your website if you've set one up (click here for help setting up your widget).
- If you’re only running one brand under this account, you can choose to automatically include this tracking on each new event that you create on Quicket by setting the toggle to ‘YES’.
- Click ‘Save’.
Now, you’re all set to create your audience and ad on Facebook.
Create your audience and ad on Facebook
You can create an audience before you create your ad on Facebook, or you can create it during the ad creation process.
Click here to find out more about creating audiences, and click here for more about creating custom audiences from pixels. You can also read more about pixels here.
Once you have your custom audience that includes anyone who saw content from your page, and excludes anyone that reached the EFT successful and the booking completed page, you’ll be able to target this audience with ads.
What’s next?
Lesson 10: Using part of your marketing budget for paid digital ads - Section 6
That’s it for this course!
Before we end off, remember that each of the platforms we’ve mentioned in our suggestions here have their own extensive help portals, and guides for how to use them for your needs.
More than anything, remember:
- That you need to spread the word about your event
- To diversify your marketing efforts
- Be sure to track your efforts - you won’t know what’s not working if you can’t see how effective your efforts are
We hope this course has given you an overview (and in some cases detailed insight) into how you can effectively market your event.
Our next course covers everything relating to event day: what you need to remember leading up to your event to make sure you’re not left in the lurch on the day, important things to remember on the day that are often forgotten, and what to do once event day is over. Click here to head to our courses page and check it out now.

Nina is the Marketing Manager for Quicket and is passionate about growing a community of event organisers into one that is empowered to create incredible experiences. An event organiser herself, she’s also worked across brand marketing, social media, and in the non-profit world. She’s a burner (AfrikaBurn) at heart, an avid baker, loves a good hug, and cooking dinner for friends over a glass of good wine.